Showing posts with label myCreations. Show all posts

Sunday, April 8, 2012

Tunisian Stitch Egg Cozy


My grandmother, Patt, crocheted projects using a lesser-known stitch called Tunisian crochet or Afghan crochet stitch. It is also known as “the knit stitch” as it works like knitting a row: pick up every stitch in a row, then decrementing the row (see this video).

My grandmother made thick crocheted blankets using two colors. One would feed on the left (used every-other row) for the front and the other would feed from the right for the back.  The picture below was white on the back and variegated on the front (which shows through on the back).


This egg cozy reproduction is made in best likeness to her original Tunisian stitch Egg Cozy.  It took me a stinkin' long time to find the stitch (does it look knit or crocheted???) and the right yarn (you will have to go to the right yarn shop).  Here is a side-by-side view of the chicks.  The paler one on the right is the original.
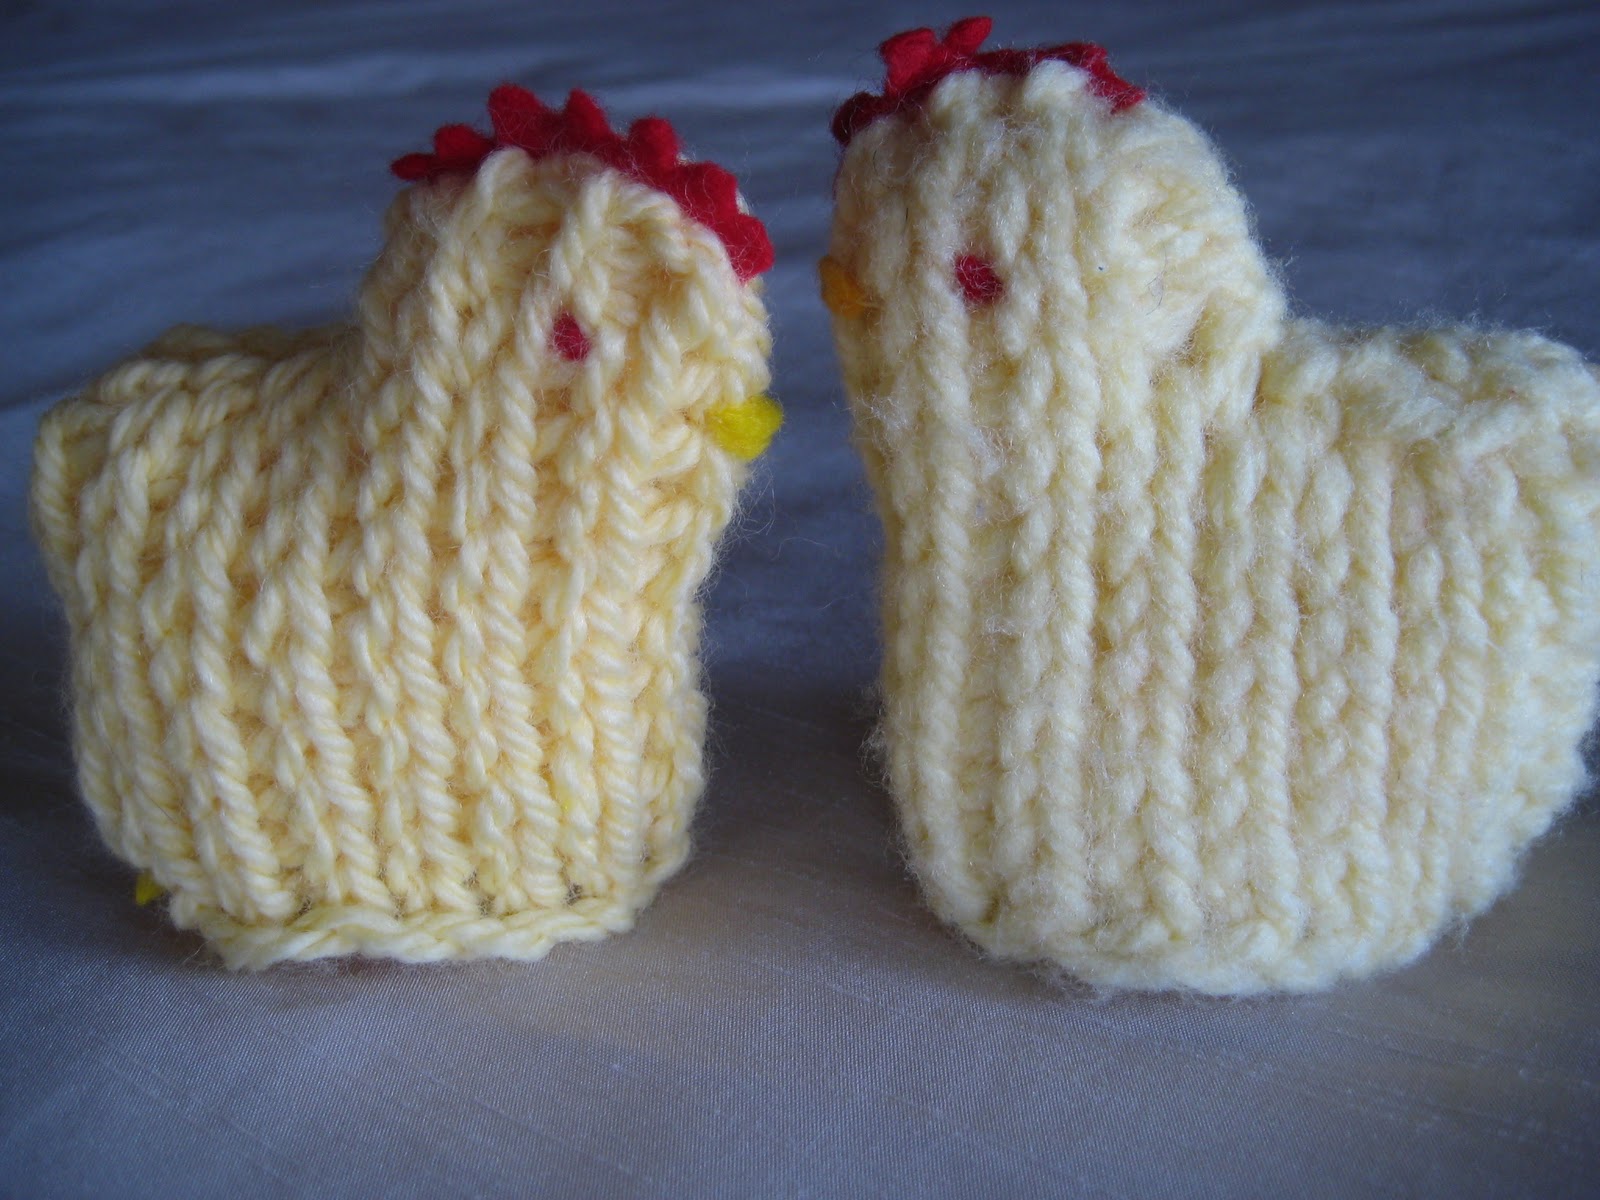


Grandma's Egg Cozy 
Materials: Pale yellow chunky weight yarn, size M crochet hook or size to produce a chick 3” wide by 3 ½” tall, red felt, needle and thread.  Time: About 15 min to crochet and 15 minutes needlework.
Instructions: Chain 18. Tunisian crochet 8 rows (down and back). On 9th row, slip stitch 5 stitches, pick up next 8 stitches and leave remaining 5 stitches. Tunisian crochet 3 more rows and finish off. Sew raw edges together, leaving bottom open for egg. Cut 1”x1/4” red felt and scallop one edge. Sew onto top of chick's head. Sew on little red felt eyes and a 1/8” orange felt diamond for a beak.
 

Happy Easter!


Monday, July 4, 2011

Stars of all Sizes Quilt


Happy 4th of July Quilt: Stars of All Sizes

It was hard to make something "manly" with absolutely no flowers, but I loved the end result.  This quilt was a Christmas present I made last year - Stars of all Sizes.  My little star is shown above at Christmas time :)  ((His daddy wore that outfit as a baby!!!))

To piece it, I took discard 12x12 sheets of scrapbook paper and cut them into many sized rectangles.  I drew stars on each with a ruler.  First, a horizontal line across the center.  Then I diagonal  line from the center left to the bottom right.  Then two diagonals on the top for the top point, and four more on the bottom for the center triangle and bottom two points.

After I cut the paper into the pieces, I replace each piece with fabric.  Once I had the fabric for that star cut, I would sew together that block.

I found that this was a very inaccurate way to piece because I hadn't accounted for seam allowances.  But, since it didn't matter the end size of each block, or the mis-figured shapes, they just ended up smaller.

I  started cutting the outside edges much larger for the end-effect of a small star in a big background.  This resulted in a lot of wasted background since the background peices started overlapping terribly the bigger the block was.

I also started using bunches of strips sewn together for my star pieces and for accent squares, creating little vinettes for each star - shown on the left.

I drew every star different every time.  Then I arranged the stars into the future quilt, and started replacing each paper with a fabric star when the block was completed.  On the right is a picture of the paper quilt with some stars replaced.

For the quilting, I wanted to dress up my solid brown sashing, so I chose to quilt stars.  It turned out to be quite a challenge.  Here was my plan, drawn on the computer.  And that's about as good as the actual quilting.

The finished size was about 68"x60".  I used Sandy's cheater binding method (fold the back over to the front and topstitch).  That saved quite a bit of time at the end, and I had NO time left at the end.  It took 30 hours to piece and 10 hours to quilt.  In the end, there were a couple disappointments (there always are).  First, I thought I would like how randomly placed the stars were, but I wish it lined up better.  I just threw sashing in and hoped for the best.  Second, I wish I'd used flannel on the back.  A nice soft functional flannel, maybe thicker batting, so that it would have been more blankety.  I didn't have time to wash it so I don't know if that would have helped.  But I was very happy with everything I learned and I still love how the vinettes turned out.

Happy Fourth of July!  Who is Your Star This Year?

Wednesday, April 6, 2011

Big Swaddler


I had to make our baby a new swaddler.  But being 9 months when I made this...now 12 months old, I think we will call it a "sleeping bag."

The pattern for the swaddler isfrom Craftzine, found here.  To make the big one, I increased the length by a bunch of inches and everything else by about an inch.  If I did it again, I would make the "flap" be able to fold down more because it's hard to get his legs in sometimes.

Tuesday, October 26, 2010

Baby Ribbon Blanket


I whipped this out last week - it's a ribbon blanket! It is so soft and fuzzy and the perfect size for some baby's lap. The baby loved it! I had to pull it away from him before he drooled all over some baby girl's ribbon blanket. Unfortunately I don't know any upcoming baby girls right now so I'll have to hang onto this one to give away later.

Here's how to make one. Cut 3 strips of two coordinating fabrics (A and B). Each strip is 6"x18". Sew the front together in the order A-B-A and the back in the order B-A-B. Baste loops of ribbon onto the front, then sew front to back with right sides together. Turn inside out and topstitch all the way around, closing your hole. All done!

I made this with the nanny who has been helping out twice a week. She's such an angel....I feel so lucky to move somewhere new and find someone I can trust the baby with.

Monday, June 7, 2010

Two Topsy Turvey Quilts

I picked these fabrics up because I wanted to try a "quilt in a hurry" to match the brown and turquoise PackNPlay that I bought. Turns out they are never done quickly if you quilt them yourself.


Tuesday, June 1, 2010

Rock Climbing Chalk Bags

His and Hers Chalk Bags

I made it up so here you go:

Materials:
Black stretchy fabric 6"x9" (9" is because I bought quarter yards of everything).
Outer fabric that is 9"x9" and some stiff interfacing ironed onto it.
Inner fleece that is 7"x9"
Drawstring
String Pull
Eyelet
1"x9-10" VERY stiff interfacing

So the shortest ends together for all three peices of fabric to make 3 tubes. So the bottom closed on the outer fabric and fleece, making them pockets. Pinch the two bottom corners flat and so a seam across the corner to turn the pockets into gift bags. Fold the black stretchy tube into itself so both inside and outside of tube are the "right side." Sew the black strechy into the fleece as you would a sleeve on a shirt. Sew an extra line about 1/4" above where the fleece and black stretchy meet. This provides casing for the drawstring. In fact, string the drawstring through right now, put an eyelet in your outer fabric. Now for the final stretch.


Place the fleece "gift bag" right-side-in inside the outer "gift bag" which is right-side-out. Align your eyelet with where your drawstring comes out of the black stretchy and pull it through. You should not see any of your seam allowances and you should have one cut edge (the top edge of the bag made of the outer fabric) and one folded edge (the top edge of the black stretchy). Now I take my 1" wide interfacing - didn't even sew it down - and fold it in as I fold down the top edge of the outer fabric. This part is kind of like rolling a sleeve. It took me about 2 folds before I reached the black stretchy. Then I topstiched this down, and the bag was complete!....5 minutes later...oops, it needs a loop or two so it hangs from the caribeaner. Use 2"x9" outer fabric and sew into a tube. Turn, iron flat, and attach to the chalk bag.

Note: The guy at the rock climbing store told me to make sure the fleece is thick enough that the chalk doesn't slip through. I'm happy to report that the walmart $4 fleece works just fine. So does the $8 fleece, which is much softer.


Friday, April 9, 2010

Easy Tote


I made this one up and use it all the time.  It is the perfect size and it is very simple.  BUT I can't give instructions because it was a while ago.

Friday, April 2, 2010

Skirts Made Last Year


I made up these different skirts and here's how I did it:

For the orange cordoroy (top left) and the brown damask (bottom right) I had a store bought A-line knee length skirt, and laid it on my fabric and cut out 2 of fabric and two of lining.  Then I sew them front-to-back, sew lining to fabric along the top, finish the bottom edges, and sew in a zipper.  It's all pretty easy except sewing in the zipper.

Therefore, the blue-brown and the pink-green skirts are both elastic.  Though it's hard to see, both are "tiered" skirts.  The top tier is about 7" long.  The second tier is the length left to get to my knees.  The blue skirt, I gathered the second tier.  The pink skirt, I pleated it.  Neither of these are lined.  I would say the blue skirt was the easiest of all.

I wish I could give dimensions so I can repeat this easier, but they were all a while ago and I've forgotten.

Friday, March 12, 2010

Polka Dot Curtains


I'm going to share my craft room now, so instead of my purple curtains, I wanted to throw together something less girly.  Here are the instructions I made up:

13 peices of 4.5x9" for the tabs.  Fold hot dog style and sew into a tube.  Turn inside out (move seam to center), fold in half hot dog style (seam hidden), and pin every 9" along the curtain front panel (~135" wide). 

Curtain front: Three 12" tall by width of the fabric of your favorite print, sewn together on the short ends.
Curtain back: Three 11.95" =) tall by width of the fabric in white, sewn together on the short ends.
Curtain trim: Three 6" by width of fabric in coordinating print, sewn together on the short ends, ironed in half the long way.

Sew front to back along the top, making sure tabs are in the seam allowance too.  Sew along the short sides and turn inside out.  Only the bottom edge is raw.  Sew the curtain trim to the bottom of the curtain (turn the side edges inside).  Then fold to the back (on the crease) and topstitch, stitch-in-the-ditch or handstitch the back edge down.

Here's the quilt top for the Topsy Turvey quilt that matches.

Saturday, February 20, 2010

Amy Butler Pillows and Tablecloth

I found out that pillows tend to be star shaped when you stuff them. The bigger they get (and I wanted BIG) the harder it is. So my mom told me to miter the corners by an inch so they corners weren't as poky. Looks great! These are 22" big. They are not square. They taper in from the middle to the corner. By the time I got to the corner, I was taking off an inch.


Of course, I had to make the pillow form myself. It is 21" square #10 batting, stuffed lightly.  The pillow fronts are Amy Butler Fabric and the backs are Cheap-O. The tablecloth was 60" Amy Butler Lotus and 3 yards long.  The important thing was to get heavy fabric. It makes a big difference.


Monday, January 18, 2010

A Couple of Baby Projects

Here are a couple of things I made over Christmas in preparation for The Kid to come.  Since we don't have a name, we just call him The Kid.  I'm told we're not going to put that on the birth certificate.


Diaper Bag from Simplicity 2924 (it's a good pattern for all those things).


Boppy Pillow: Made up myself by using a belt for the inside and about 9" wide all the way around.


Mittens from some not-so-good pattern and a motif I made up.